
How To Choose The Right Radiology Tech School For You
Choosing the right radiology tech school is a big step for your career. This guide explains easy steps you can follow to make the right decision. It uses simple wording so readers can understand without confusion or technical terms. Each section highlights important points like accreditation, clinical training, and exam preparation for your future.
You can track progress and build confidence in your journey by following these steps. Practical advice on hands-on practice and program details will guide you toward success. Use this resource as a checklist when comparing schools, costs, and job placement support.
What is Radiology Tech?
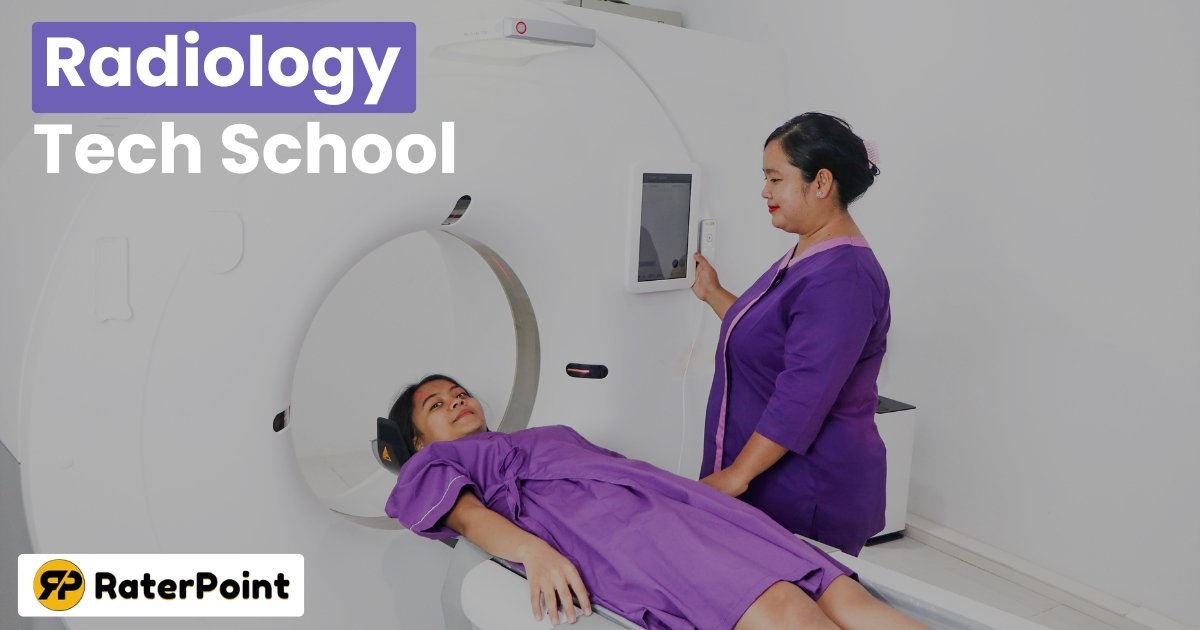
A radiology technician captures medical images that doctors use to diagnose illnesses. They operate X-rays, CT scanners, and sometimes MRI machines during exams. Radiology techs position patients carefully to get clear, accurate diagnostic images. They follow strict safety rules to limit radiation exposure for patients and staff.
Most work in hospitals, clinics, or a doctor’s office, performing daily imaging tasks. They also assist doctors with image review and explain simple exam steps to patients. Training covers clinical training, anatomy, patient care, and equipment operation skills. With proper education, many become certified imaging technologists and find steady jobs.
Why the right school matters
Choosing the right radiology tech school shapes your career and future opportunities. A strong program teaches the exact skills you need for genuine patient care. Good schools focus on hands-on practice, not just classroom lessons or theory. Clinical training with real equipment prepares you for daily work in healthcare.
Accredited programs guide you toward passing the national certification exam with confidence. High-quality schools also provide career services and support for job placement after graduation. Picking the right program helps you build experience, gain knowledge, and start working quickly.
If you want to reset Windows 11 without losing your data, you must understand backup and system preparation first. In this context, our detailed guide ‘How to Reset Windows 11 PC Without Losing Data?‘ provides step-by-step instructions and essential tips to help protect your files and keep your PC safe.
Before you start
You need a high school diploma or a GED to enter a radiology tech school. Students who enjoy science and working with people often succeed in this career path. Be prepared for hands-on practice since patient care involves physical tasks and some lifting.
Plan enough time for classes, study sessions, and required clinical training hours. Balancing school, personal life, and clinical rotations is vital for steady progress. Starting with clear goals and preparation makes the journey easier and more successful.
Step-by-step guide
Step 1: Decide the exact job you want

The first step in choosing a radiology tech school is deciding on your career path. There are different imaging jobs, such as X-ray technician, CT technologist, MRI technologist, or ultrasound specialist. Each role requires specific training, unique clinical skills, and certification for professional practice.
Some students start with a general radiography program before entering advanced imaging specialties. Think about your interests, strengths, and long-term goals in the healthcare field. Picking the proper focus early helps you choose the best accredited program for success.
If you’re exploring ways to save money and use AI tools effectively, check out our guide ‘What Is Koupon AI and Why Should You Care? A Complete Guide.’ It explains how Koupon AI works, its benefits, and why it matters for smart shopping and business efficiency.
Step 2: Choose the type of program
When selecting a radiology tech school, you must decide which program fits your goals. A certificate or diploma takes about one year and helps you start working quickly. An associate degree usually takes two years and offers more complete training in radiography. A bachelor’s degree takes four years and prepares students for advanced or leadership roles.
Before choosing, consider your available time, financial situation, and long-term career goals. Picking the right program ensures you gain the education and clinical training needed for success.
Step 3: Look for accreditation
Always choose a radiology tech school that has proper accreditation from trusted organizations. Accredited programs follow strict quality standards and meet important educational and training rules. Accreditation ensures your degree is recognized and accepted by employers and licensing boards.
It also prepares you for the national certification exam to begin professional work. Finding jobs or transferring credits to other programs becomes very difficult without accreditation. Check that the main radiography accreditation board approves the program before applying.
Step 4: Check clinical training and labs
A good radiology tech school must provide strong clinical training with real-world experience. Students should practice using X-ray machines, CT scanners, and other diagnostic imaging tools. Modern labs give students hands-on practice before working directly with real patients.
Hands-on training builds confidence, improves technical skills, and prepares you for future clinical work. Ask how many clinical hours the program includes and where rotations will happen. Schools with updated labs and strong hospital partnerships provide the best career preparation opportunities.
Step 5: Compare graduation and exam pass rates
A reliable radiology tech school will openly share graduation and certification exam pass rates. High pass rates show students are well-trained and prepared for professional imaging careers. Graduation rates also reflect how well the program supports students during clinical training.
Always compare schools by checking these numbers before making your final enrollment choice. Strong results in both areas increase your chances of job placement after graduation. Selecting a program with proven success ensures better preparation and long-term career growth.
Step 6: Check the cost and money help
When choosing a radiology tech school, always compare tuition, fees, books, and other expenses. Ask about available scholarships, grants, and student loan options offered through the program. In the United States, complete the FAFSA form to apply for federal financial aid.
Understanding actual costs helps you plan and avoid unexpected financial stress during studies. Schools that provide precise details on financial aid make education more affordable and accessible. Careful planning ensures you can finish your program and begin your radiology career.
Step 7: Review schedule and location
Before joining a radiology tech school, review the class schedule that fits your lifestyle. Some programs provide evening classes, weekend sessions, or flexible part-time study options. Always check commuting time and consider how travel will affect your daily routine. A nearby location reduces stress, saves money, and improves clinical training focus.
If you work, find programs that support balancing employment with required coursework. Choosing the proper schedule and location ensures steady progress toward your radiology certification goals.
Step 8: Meet teachers and students
Before selecting a radiology tech school, talk directly with instructors and current students. Ask about teachers’ professional background, clinical experience, and approach to radiology training. Instructors with real-world healthcare knowledge provide stronger guidance and practical hands-on learning.
Current students can share honest feedback about classes, labs, and clinical rotations. Learn how the school supports students with tutoring, exam preparation, and job placement help. Meeting people face-to-face gives you confidence in the school’s quality and overall environment.
Step 9: Look at job help and internships
A strong radiology tech school should provide career services that support your employment goals. Ask if they offer job placement assistance, including resume reviews and interview preparation. Schools with internship programs give valuable clinical training and connections to local healthcare employers.
Internships build experience, strengthen your resume, and improve chances for quick job opportunities. Career services that continue after graduation show real commitment to student success. Choosing a school with job support ensures a smoother entry into radiology.
Step 10: Check admission rules and prepare
Before applying, carefully review all admission requirements for your chosen radiology tech school. Check required courses like biology, anatomy, or basic math, and meet GPA minimums. For clinical participation, many programs require CPR certification, background checks, and TB tests.
Gather transcripts, recommendation letters, and any other documents requested by the school. Preparing early ensures your application process goes smoothly and avoids last-minute delays. Understanding rules ahead of time helps you start your radiology training on schedule.
Step 11: Apply and get ready for interviews or tests
Submit applications to your top radiology tech schools carefully before the deadlines. Prepare for any required entrance tests or school interviews to increase acceptance chances. Practice answering common questions and reviewing basic science and patient care concepts for interviews.
Keep organized copies of transcripts, recommendation letters, and all application paperwork for reference. Being fully prepared reduces stress and helps you start your clinical training smoothly. Following these steps ensures a confident and well-planned application process.
Step 12: Finish the program
Attend all classes and complete the required clinical training hours to gain hands-on experience. Study regularly and review notes to understand radiology procedures and imaging equipment thoroughly. If you struggle with topics, ask instructors or peers for additional guidance. Join study groups or use tutors to strengthen your knowledge and skills.
Staying consistent ensures you are prepared for the certification exam and professional practice. Completing the program successfully builds confidence and readiness for a radiology career.
Step 13: Get certified and licensed
After graduation, take the national radiology certification exam required for professional practice. Passing the exam allows you to obtain your state license and start working legally. Certification proves your knowledge in imaging procedures, patient care, and safety standards.
Continuing education helps you stay updated with new radiology technology and techniques. Maintaining licensure ensures long-term career growth and access to better job opportunities. Following this step secures your position as a qualified and trusted radiology technician.
Step 14: Start your job search
Highlight your clinical training experience on your resume to impress potential employers. Ask instructors and mentors for strong professional references to support your applications. Search for entry-level radiology tech jobs in hospitals, clinics, and healthcare centers nearby.
Tailor your resume and cover letter for each position to show relevant skills. Use your network and school career services to discover more opportunities. Starting your job search early increases the chances of securing a position quickly.
Step 15: Keep growing in your career
After starting work, continue learning new imaging skills to stay competitive in healthcare. Take special courses or workshops to expand knowledge and expertise in advanced procedures. Earning extra certifications increases your career opportunities and potential for higher salaries.
Stay updated on new radiology technology and best practices through ongoing training programs. Continuous growth helps maintain professional confidence and improves long-term job security. Committing to learning ensures you remain a skilled and valuable radiology technician.
Simple example timeline
Months 1–3: General classes and imaging basics
Complete general classes in months 1–3 and learn basic radiology techniques. Focus on understanding anatomy, patient care, and medical terminology. This period builds the foundation for future clinical training and imaging practice.
Months 4–12: Advanced classes and clinical rotations
During months 4–12, continue advanced classes while starting clinical rotations in hospitals or clinics. Hands-on experience strengthens your skills with X-rays, CT scans, and MRI equipment. Applying classroom knowledge in real settings prepares you for professional work.
Year 2 Specialized courses and full clinicals
In year 2, focus on specialized courses and complete full clinical training in healthcare settings. You will handle more complex imaging procedures and patient interactions. This stage ensures readiness for certification and future job placement.
End of Year 2 Graduation and certification exam
At the end of year 2, graduate and prepare for the certification exam to start your career. Passing the exam qualifies you as a licensed radiology technician and opens job opportunities in hospitals and clinics.
Shorter certificate programs
Shorter certificate programs may finish in about 12 months, covering essential radiology skills efficiently. These programs focus on quick entry into the field while still providing hands-on practice.
FAQ’s
How long will school take?
Most associate degree programs take about two years to complete fully. Certificate programs usually take around one year, offering faster entry into radiology careers.
Do I need a license to work?
Many employers require national certification and a state license to practice legally. Certification proves your competence in imaging procedures and patient care.
Can I work while I study?
Some students manage part-time work, but clinical hours can be long and demanding. Plan carefully to balance classes, hands-on training, and employment.
Are online programs real?
Some theory classes are offered online, but clinical training must be completed in person. Hands-on practice is essential for learning radiology skills safely.
Is this a safe job?
Radiology techs follow strict safety rules to limit radiation exposure. Safety is taught thoroughly during clinical training and lab sessions.